How to record your PC’s sound

In recent years, the ability to record your own audio has become a must-have for many PC users. Whether you’re recording a podcast, creating original video or just saving for future reference, it’s become an increasingly valuable tool for use in both our personal and professional lives.
Various free and paid software makes that process quite straightforward, but it will often only record what’s coming in through the mic (built-in or external). What if you want to capture the audio that’s coming out of your speakers instead?
Here are two relatively simple ways to do just that.
How to record PC audio using Stereo Mix
We’ll be using Windows 10 for the purposes of this tutorial, but for older software and macOS the third-party software mentioned is still available.
Stereo Mix is a feature built into Microsoft’s operating system, but it’s disabled by default. To record external audio, you’ll need to turn it on:
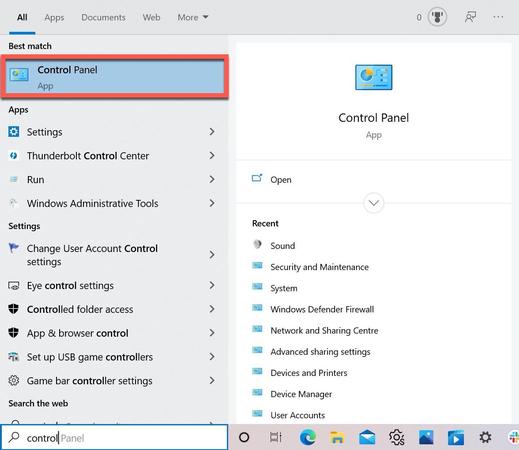
- In the search bar next to the Start Menu, type ‘control’ and click the relevant result
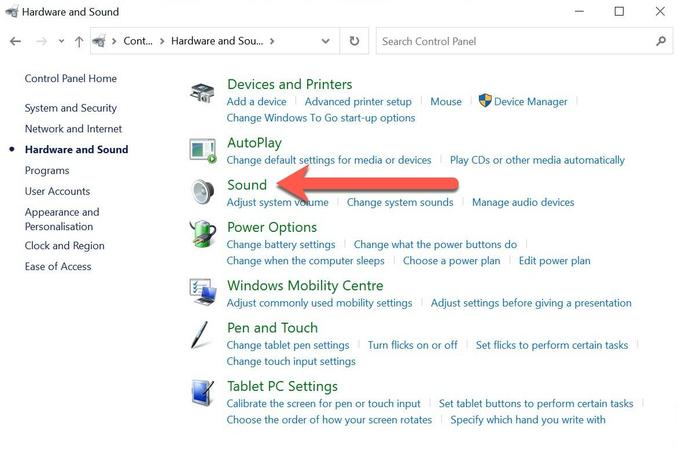
- Choose ‘Hardware and Sound’ and then ‘Sound’
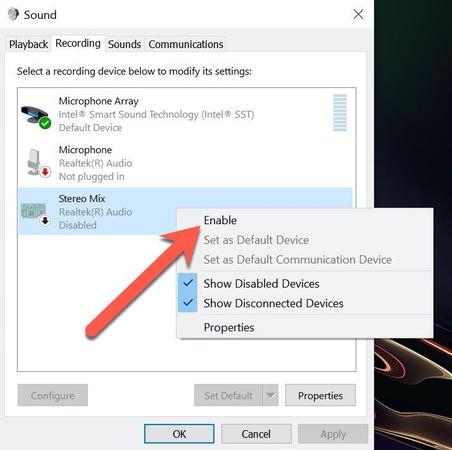
- In the window that appears, click the ‘Recording’ tab and you should see Stereo Mix marked as disabled
- Right-click it and choose ‘Enable’
- To make sure this works, we’d also recommend clicking Stereo Mix to highlight it and then ‘Set Default’ at the bottom of the page (you can always change this back after)
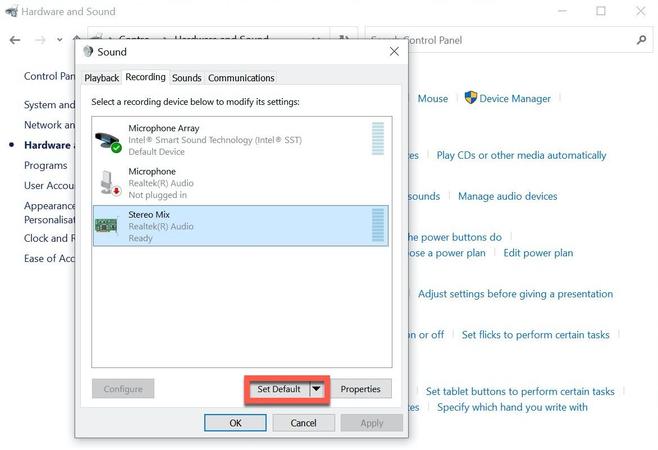
- Click ‘OK’ to apply the changes
Once that’s done, you’ll be free to open the audio recording program of your choice to record external sound to. Just make sure you select ‘Stereo Mix’ under the input device, instead of the usual ‘Microphone’ or ‘Line in’ options.
How to record PC audio using Audacity
One such program for recording audio is Audacity, but you can also use this free software to skip the first stage if you don’t have access to Stereo Mix. Here’s how it’s done:
- Download Audacity for Windows via the Fosshub website. The macOS and Linux versions also offer the same functionality for this tutorial
- Once installed, open the app and you’ll be presented with a screen like below
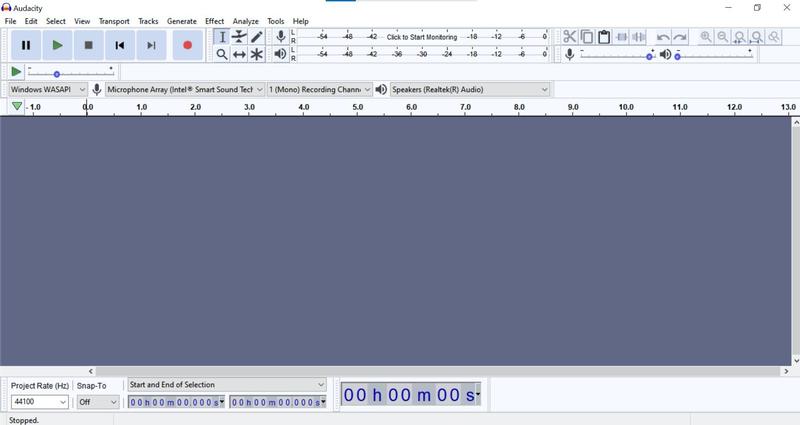
- You’ll now need to customise the drop-down boxes above the timeline. Choose ‘Windows WASAPI’ from the furthest on the left and then something containing ‘loopback’ from the next one to the right – in this example it’s ‘Speakers (Realtek(R) Audio) (loopback)’

- You’ll want to make sure that the Recording Channel is set to 2 (Stereo), otherwise you’re likely to get an error message. It’s also worth checking that the relevant speakers are set as your output device
- Once you’re ready, hit the red circle at the top of your screen and Audacity will record the audio that comes out of the speakers. It will automatically pause recording when there’s no audio, or just hit the grey square at the top to stop at any time
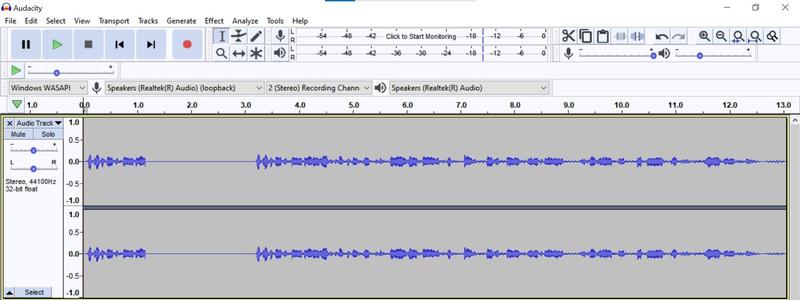
- Audacity is designed for audio editing, so you can trim and adjust your clip once recorded before exporting it as a variety of different file types.
There you have it. Two simple methods for recording your PC’s external audio. If you’re looking to record internal audio (i.e. from your microphone), try Windows 10’s built-in ‘Voice Recorder’ app or the aforementioned Audacity, both of which are very easy to use


